

Table of Contents
- Budget-Friendly Outdoor Halloween Decorating Tips: Start With a Plan, Not a Shopping Spree
- Budget-Friendly Halloween Porch Ideas That Do the Heavy Lifting
- DIY Outdoor Halloween Decorations on a Budget: Six Projects With Real Costs
- Halloween Decorations Using Household Items You Already Own
- Make It Last: Weatherproofing and Outdoor Electrical Safety
- Small-Space and Renter-Friendly Outdoor Halloween Decorating
- Store It, Reuse It, and Skip the Cheap Stuff Next Year
- Conclusion: Scary Good, Not Scary Expensive
- Frequently Asked Questions
Last Updated: October 8, 2026
Budget-Friendly Outdoor Halloween Decorating Tips: Start With a Plan, Not a Shopping Spree
Budget friendly outdoor Halloween decorating tips start with one boring truth: the spookiest thing on your porch is your credit card statement. At Caltucky Creations, we sell funny shirts, candles, and mugs, so we have no dog in the inflatable-dragon fight. Most yards look great for one weekend and cost a fortune.
Consumer Product Safety Commission guidance on seasonal decorations
Set a Real Number Before You Buy Anything
Pick a total budget and split it into three buckets: reuse, cheap buys, and free stuff. Spend most of it on one or two anchor pieces, then fill in with what you already own. Decide the number first, then shop, never the other way around.
Budget-Friendly Halloween Porch Ideas That Do the Heavy Lifting
Your porch is the whole show. Nobody walks your backyard at night. A handful of cheap, high-impact moves can carry the entire display.
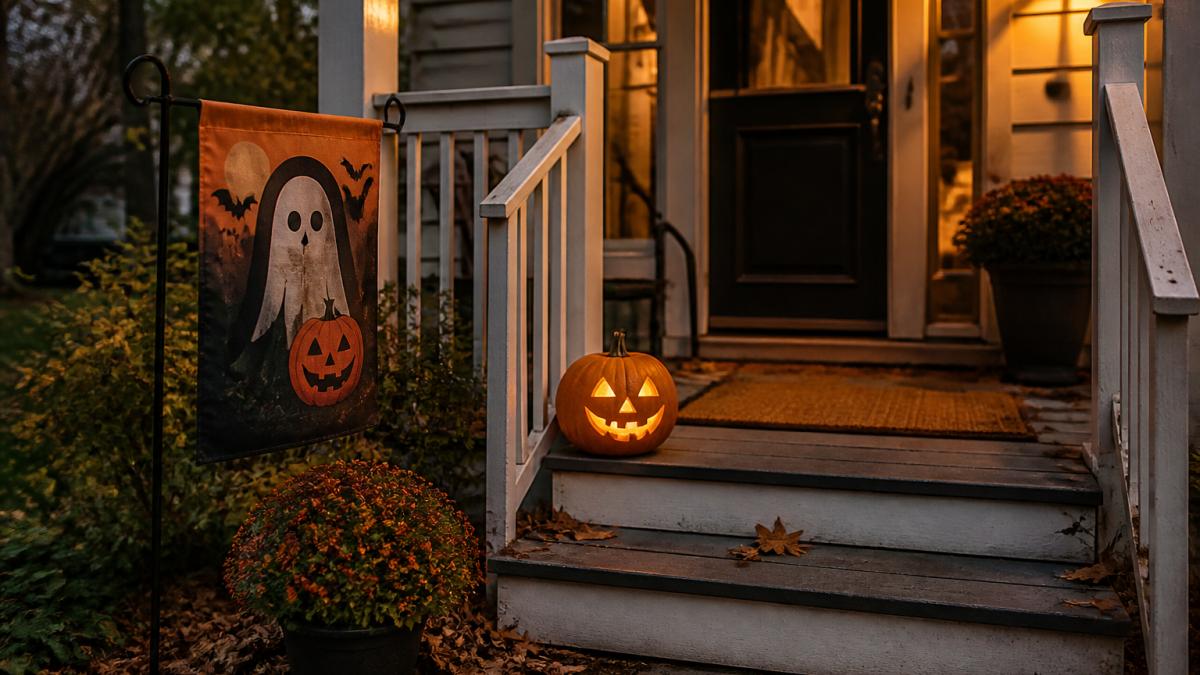
The Porch Display Formula: Height, Light, Texture
Use this simple formula for any porch:
- Height: one tall thing, like a ladder or a post
- Light: one warm or orange light source
- Texture: something soft, like fabric or moss
That is it. Three elements, one small budget. A single carved pumpkin plus a string of lights plus a hanging sheet ghost beats a pile of random stuff every time.
DIY Outdoor Halloween Decorations on a Budget: Six Projects With Real Costs
DIY outdoor Halloween decorations on a budget beat store-bought props because you control the size, the style, and the spend. Here are six projects with supply lists, time estimates, and difficulty ratings, and you can swap in whatever is already in your garage.
1. Trash-Bag Ghosts on a Halloween Tree
Supplies: bare branches (free), a bucket or planter you own, white kitchen trash bags or old pillowcases (free-to-cheap), rubber bands, a black permanent marker.
Time: about 30 minutes for a tree of five ghosts. Difficulty: easy. Weather: rain-proof, plastic shrugs off a downpour, which is more than your umbrella does.
Stick the branches in the bucket, weight the base with rocks or sand, stuff a bag with crumpled newspaper, cinch a rubber band at the neck, and draw a face. Hang with twine. Pillowcases work too, hit them with clear spray so they survive a drizzle.
2. Pool Noodle Candles and a Cardboard Box Tombstone
Supplies: one pool noodle (end-of-season clearance is your friend), white and orange craft paint, a cardboard box, gray paint, a marker.
Time: about 45 minutes for candles, 40 for the tombstone. Difficulty: easy. Weather: bring the candles in during storms; seal the tombstone with outdoor paint or clear spray so rain does not turn it back into a soggy Amazon box.
Cut the noodle into tall sections, paint white, then add an orange drip at the top for a fake flame. For the tombstone, cut the box into a rounded shape, paint gray, and write a joke name, "Here lies my summer body" is a crowd favorite. Anchor it with a stake or brick; wind treats cardboard like a frisbee.
3. Wooden Plank Scarecrow and a Recycled Jar Lantern Walkway
Supplies: two wooden planks, nails or screws, a flannel shirt and jeans you were going to donate anyway, newspaper or plastic bags for stuffing, a burlap sack, old jars and tin cans, battery tea lights.
Time: about 90 minutes for the scarecrow, 20 for the lanterns. Difficulty: medium (you need a hammer and a little patience). Weather: anchor the scarecrow against wind with a stake or sandbag at the base; use LED lights only in the jars, real candles plus dry leaves is a bad combination.
Nail the planks in a cross, dress the frame, stuff the arms and legs, and add a burlap head with a drawn face. For the walkway, drop battery tea lights into clean jars and cans, then line the path, spaced so nobody trips on the way to your door.
4. Bottle Tree With Painted Glass
Supplies: empty glass bottles (wine, soda, whatever your week required), a sturdy pole or dead branch, spray paint in black, orange, or glow-in-the-dark, a base you can weight down.
Halloween Jack-O'-Lantern Garden Flag — Spooky Moonlit Pumpkin Patch Banner →
Time: about 25 minutes plus drying. Difficulty: easy. Weather: glass is fine in rain, but weight the base so the whole thing does not tip. Skip this one on a concrete patio where broken glass would be a nightmare.
Paint the bottles, let them dry, and slide them onto the branch tips. It reads as "intentional art installation" instead of "recycling bin escaped."
5. Milk-Jug Ghost Garland
Supplies: clean plastic milk jugs, scissors, twine, a black marker, a hole punch.
Time: about 20 minutes. Difficulty: easy. Weather: fully rain-proof. Cut the jugs into ghost shapes, punch holes, draw faces, and string them across a porch rail or fence. Hand this one to the kids while you tackle the scarecrow.
6. Cardboard Cauldron With Tissue-Flame
| Project | Time | Difficulty | Weather Note |
|---|---|---|---|
| Trash-bag ghosts | 30 min | Easy | Rain-proof |
| Pool noodle candles | 45 min | Easy | Bring in during storms |
| Cardboard tombstone | 40 min | Easy | Seal with paint |
| Plank scarecrow | 90 min | Medium | Anchor against wind |
| Jar lantern walkway | 20 min | Easy | Use LED lights only |
| Bottle tree | 25 min | Easy | Weight the base |
| Milk-jug garland | 20 min | Easy | Rain-proof |
| Cardboard cauldron | 35 min | Easy | Keep under cover |
And while the yard does the scaring, you can do the laughing. A funny Halloween tee under a flannel is basically a costume that works at the grocery store the next morning, the Caltucky Creations kind of multitasking.
Halloween Decorations Using Household Items You Already Own
- Jars and bottles: lanterns, potion props, or a bottle tree
- Tin cans: painted and stacked into a totem
- Old clothes: scarecrow bodies and ghost sheets
- Cardboard boxes: tombstones, signs, and skull bases
- Plastic bags: stuffing for anything soft
Make It Last: Weatherproofing and Outdoor Electrical Safety
Rain and wind ruin cheap decor fast, and cheap decor is the whole premise here. A few minutes of prep keeps your display standing through a storm, and keeps you out of the emergency room, the only kind of scary nobody signed up for.
Weatherproofing by Material
Different materials fail in different ways. Match the fix to the material:
- Cardboard and paper: seal every surface with clear spray sealer or outdoor paint, edges and bottom included. Unsealed cardboard turns to mush in one good rain, so keep tombstones under a porch overhang if you can.
- Fabric (sheets, pillowcases, old clothes): clear spray helps, but fabric soaks through eventually. Bring fabric ghosts and scarecrow clothes inside before a heavy storm, or accept that they will look "distressed" by November.
- Paint on plastic and foam: use outdoor-labeled paint or top craft paint with a clear outdoor sealer. Indoor craft paint on a pool noodle will chalk and peel within a season.
- Glass and metal: fine in rain, but weight the base. A tipped bottle tree is a glass-shard cleanup you did not budget for.
- Lights and cords: see the electrical section below, this is where weatherproofing and safety overlap.
Anchoring Against Wind
Wind is the number-one killer of cheap yard displays. A few rules of thumb:
- Stake anything tall. Scarecrows, poles, and signs need a ground stake or a sandbag at the base.
- Weight anything light. Plastic bags, tissue paper, and fabric want bricks, rocks, or a sandbag nearby.
- Lower your center of gravity. A tall, thin prop tips; a short, wide one stays. If you can, build props so the heaviest part is at the bottom.
- Tie down, do not just set down. Twine to a porch rail beats "it looks stable" every single time.
Outdoor Electrical Safety
Buy one good outdoor-rated cord and one portable GFCI adapter, and you will use them for a decade, the opposite of a dollar-store purchase that dies in a season.
Storage That Protects Your Investment
Weatherproofing does not stop when the season ends. Store everything dry, off the floor, and labeled:
- Let fabric and cardboard dry fully before they go in a bin, trapped moisture means mold by next October.
- Roll lights instead of folding them so you are not untangling a knot next year.
- Keep small pieces (stakes, twine, rubber bands) in labeled zip bags.
- Store paint and touch-up supplies with the props so you can fix chips in five minutes instead of buying new.
A display that survives the season and stores cleanly costs less every year, the real budget hack is the thing you only buy once.
Small-Space and Renter-Friendly Outdoor Halloween Decorating
Renters and apartment dwellers get the short end of the decorating stick. No yard, no holes in the walls, no problem.
- Hang a garden flag on a removable pole
- Use a doormat as your whole display
- Add a wreath with a command hook
- Skip anything that needs a stake in the ground
- Choose items you can pack flat and store in a closet
Store It, Reuse It, and Skip the Cheap Stuff Next Year
The real money saver is next year: label a bin, pack everything dry, and store it off the floor. A reusable display costs less every year, while cheap dollar-store items that fall apart cost more over time.

Conclusion: Scary Good, Not Scary Expensive
That is where Caltucky Creations comes in. Our Halloween garden flags bring the spooky scene to your porch in one move, and our funny tees, cozy blankets, and scented candles keep the humor going after the porch light clicks off. Start with a flag, grab a mug, and get your yard ready without emptying your wallet. Continue shopping at Caltucky Creations and make this Halloween the funny kind of scary.

Frequently Asked Questions
How do you decorate outside for Halloween on a budget?
A garden flag or banner runs about $15 and instantly reads as decorated, and a doormat around $25 anchors the entry.
What are some cheap DIY outdoor Halloween decorations?
Trash-bag ghosts hung from tree branches, pool noodle candles, cardboard box tombstones painted gray, and a scarecrow built from wooden planks and old clothes are the cheapest wins. Recycled jars and tin cans become lanterns with a little paint and a battery tea light. Most of these take under an hour and use materials you may already have, so the only real purchase is paint, zip ties, and a bag of stuffing.
How can I make outdoor Halloween decorations last through bad weather?
Rain and wind ruin cheap decor fast, so weight everything down and keep paper and cardboard off the ground. Anchor props with stakes or sandbags, seal painted surfaces, and bring fabric items like stuffed ghosts inside when storms are forecast. Use outdoor-rated extension cords with a GFCI outlet for any lighting, and never run cords across a walkway where someone can trip. A few minutes of prep saves the whole display.
Is it too early to put up Halloween decor outside?
Most people start decorating in late September through the first week of October, so anytime in that window is fair game. Early birds get the best selection at dollar stores and the most time to enjoy the setup. If you go up in September, weatherproof first since rain and wind are more likely, and skip anything perishable like real pumpkins until closer to the holiday.