

Table of Contents
- Why Carved Pumpkins Rot So Fast (and What You Can Do About It)
- How Long Do Carved Pumpkins Last? Realistic Timelines by Condition
- Step 1: Clean and Sanitize Your Pumpkin's Interior and Cut Surfaces
- What to Spray on Carved Pumpkins to Preserve Them
- Does Vaseline Preserve Carved Pumpkins? What Actually Works
- How to Keep a Carved Pumpkin From Rotting: Daily Care and Maintenance
- Preservation Before Carving: Prevention Tips and Lighting Choices
- Conclusion: Keep Your Jack-o'-Lantern Looking Fresh
- Frequently Asked Questions
Last Updated: October 6, 2026
Why Carved Pumpkins Rot So Fast (and What You Can Do About It)
A carved pumpkin is a race against biology, and biology usually wins.
The good news? You can slow it down.
Short version: an untreated outdoor pumpkin lasts a few days. Cleaned, sanitized, and coated, it can hang on a week or more, depending on weather.
How Long Do Carved Pumpkins Last? Realistic Timelines by Condition
A carved pumpkin typically lasts 3 to 5 days outdoors in cool weather and up to 1 to 2 weeks indoors with proper care. Heat, humidity, and direct sunlight speed up decay.
Here's what to expect based on where your pumpkin sits:
- Outdoors, warm days: 3 to 5 days before visible shriveling
- Outdoors, cool nights: 5 to 7 days with treatment
- Indoors, climate controlled: 1 to 2 weeks with treatment
The biggest factor isn't the treatment you pick. It's the environment.
Indoors vs. Outdoors: What Changes
Outdoor pumpkins face sun, rain, insects, and temperature swings, all of which speed up mold and bacteria. Indoors, you control temperature and humidity, so a treated pumpkin holds its shape much longer.
Want your jack-o'-lantern to survive until Halloween night? Bring it inside during the day and set it out only after dark. That one habit adds days.
Step 1: Clean and Sanitize Your Pumpkin's Interior and Cut Surfaces
Cleaning is the most important step, and most people rush it. Leftover pulp or seeds become a buffet for mold.
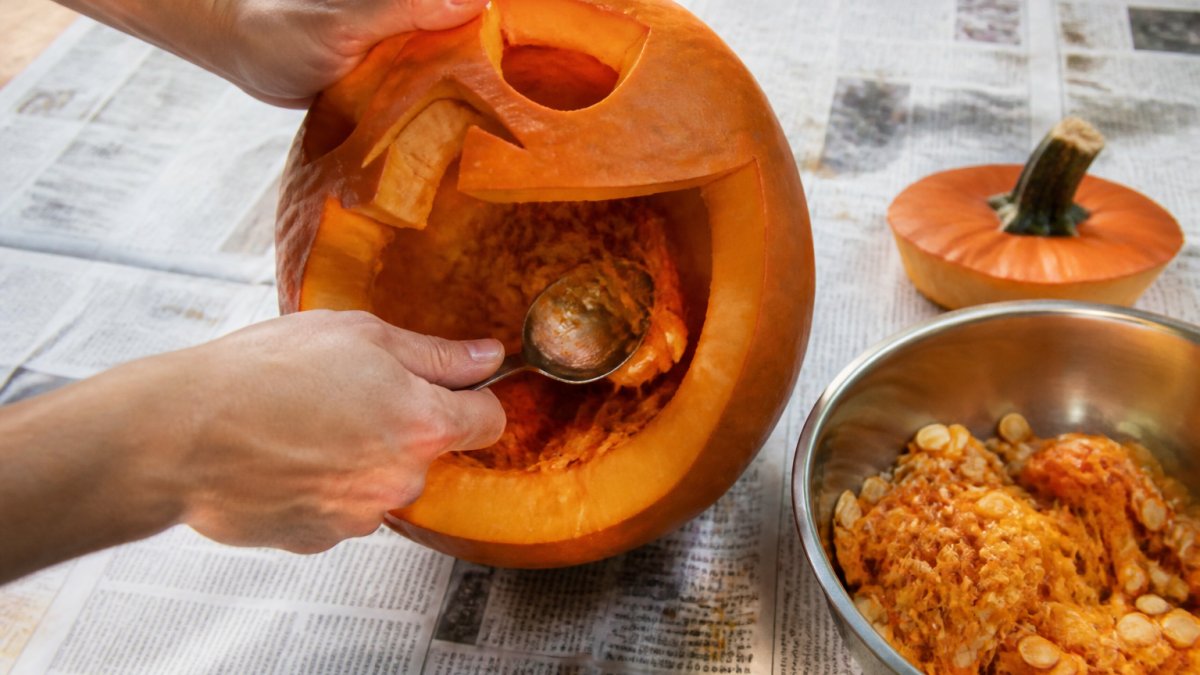
Removing Seeds and Stringy Pulp
Use a sturdy metal spoon or ice cream scoop and scrape in firm strokes until you hit clean, firm flesh. Pay extra attention to the lid and carved edges, those thin sections dry out and rot first. Save the seeds for roasting, but keep them out of the pumpkin's interior.
Bleach Solution Soak: Ratios and Safety
A diluted bleach soak kills mold spores and bacteria on contact. Mix roughly one part household bleach to nine parts water, then soak or spray the pumpkin inside and out.
For official household handling guidance, the EPA's Safer Choice and disinfectant guidance is a solid reference.
What to Spray on Carved Pumpkins to Preserve Them
Spraying is the cheapest way to buy your jack-o'-lantern a few extra days, but only if you match the solution to the problem.
| Treatment | Mix / Application | Reapply | Realistic Added Life | Main Trade-Off |
|---|---|---|---|---|
| Plain water rinse | Cool water, inside and out | Daily | 0 to 1 day | Removes pulp but adds surface moisture |
| White vinegar spray | 1 part white vinegar to 1 part water | Every 1 to 2 days, and after rain | 2 to 4 days | Smell fades fast; washes off outdoors |
| Diluted bleach soak | About 1 tablespoon household bleach per 1 quart water | Once, right after carving | 3 to 5 days | Must be handled carefully; not for pumpkins near food |
| Commercial pumpkin spray | Follow the label | Per label, usually every few days | 3 to 7 days | Costs more; availability varies by store |
| Petroleum jelly (barrier) | Thin coat on cut flesh only | Every 2 to 3 days | 2 to 4 days on shriveling | Greasy; traps dirt and pet hair |
Those ranges assume a cool, shaded spot. Add direct sun or a warm afternoon and shave a day or two off every row; a climate-controlled room adds a day or two back.
How to Run Your Own Side-by-Side Test
If you read the back of the shampoo bottle, this is your moment. Grab two pumpkins from the same bin, carve them the same day, treat one and leave the other as a control. Check both every morning for soft spots, fuzzy patches, and pulled-back edges.
Vinegar Spray: The Everyday Workhorse
Mix one part plain white vinegar with one part water in a spray bottle. Spray the inside walls, cut edges, and carved details until damp but not dripping. Vinegar lowers surface pH, making it harder for mold spores to settle in. The catch: rain rinses it off, so reapply every day or two on a porch pumpkin, every two to three days indoors.
Bleach Soak: Strong Start, Careful Handling
A diluted bleach soak is the strongest opening move because it kills mold spores and bacteria on contact. Mix roughly one tablespoon of household bleach per quart of cool water, submerge or thoroughly spray the pumpkin, let it sit a couple of minutes, then rinse and dry.
For general household handling guidance, the EPA's safer disinfectant and household chemical guidance is a solid reference.
Commercial Sprays: Convenient but Not Magic
Commercial pumpkin preservatives typically combine a mild antimicrobial with a film-forming agent, fighting mold and slowing moisture loss at once, that dual action is why they outperform a single homemade spray. Trade-offs: cost and availability, so read the label for reapplication timing.
The Order That Actually Works
To stack methods, do it in this order: carve, scoop, rinse, bleach soak, dry completely, then coat the cut flesh with petroleum jelly or a commercial spray. Vinegar is your maintenance spray after that. A barrier coat over a wet pumpkin just traps moisture against the flesh.
Does Vaseline Preserve Carved Pumpkins? What Actually Works
Vaseline does help preserve carved pumpkins, but only as a moisture barrier, not a mold killer. Petroleum jelly seals exposed flesh so it loses water more slowly, slowing shriveling. It won't stop rot that's already started, think shield, not cure.
Petroleum Jelly vs. Vegetable Oil: Moisture Barriers Compared
Both petroleum jelly and vegetable oil coat the cut surfaces and slow moisture loss. They behave differently in practice.
| Barrier | How It Works | Best For | Watch Out For |
|---|---|---|---|
| Petroleum jelly | Seals flesh, blocks air | Cut edges and carved details | Feels greasy, attracts dirt |
| Vegetable oil | Light coating, easy to spread | Large exposed areas | Can go rancid, needs reapplication |
| Vinegar spray | Lowers surface pH | All surfaces, daily upkeep | Washes off in rain |
| Bleach soak | Kills mold and bacteria | First treatment after carving | Requires careful handling |
Apply any barrier with a cotton swab or your fingers, focusing on carved edges and inside walls. Skip the outer skin, it already does that job.
How to Keep a Carved Pumpkin From Rotting: Daily Care and Maintenance
Daily care separates a pumpkin that lasts a week from one that's mush by Tuesday. Check it every morning, treat it every night, and move it out of the sun.
A simple routine keeps rot away:
- Check for soft spots and dark patches
- Wipe away any moisture inside the pumpkin
- Reapply vinegar spray or barrier coat
Cool temperatures and low humidity are your allies. Direct sunlight and standing water are not.
Signs of Spoilage and Troubleshooting
Catch problems early and you can often save the pumpkin. Here's what to look for:
- Soft spots: cut them out with a knife and re-treat the area
- Fuzzy gray or white patches: mold. Wipe with vinegar and increase airflow
- Shriveled edges: moisture loss. Add a barrier coat
If the whole pumpkin feels soft, no treatment will bring it back. Compost it and carve a fresh one.
Preservation Before Carving: Prevention Tips and Lighting Choices
The best preservation starts before you pick up a knife. A healthy, firm pumpkin resists rot far better than a bruised one, and the week before carving can add days to the final result. Most guides skip this and jump straight to bleach. Don't be most guides.
Picking a Pumpkin That Wants to Live
Look for a solid, dry stem still attached, a missing stem is an open door for mold. The skin should be firm and evenly colored, with no soft spots, dark bruises, or punctures.
Skip any pumpkin sitting in a wet pile or showing white fuzz at the base. You can't out-treat a pumpkin that's already rotting.
Storing It Before Carving Day
Keep uncarved pumpkins cool, dry, and out of direct sun, a garage, shaded porch, or the coolest kitchen corner, ideally around 50 to 60 degrees Fahrenheit. Don't stack them, and keep them off damp concrete. A healthy uncarved pumpkin holds for weeks, so buy early and carve late.
Timing Your Carve
The single biggest lifespan decision is when you carve. Carve too early and you're fighting biology for a week. Carve two to three days before display, treat immediately, and keep it cool until showtime. If Halloween is the goal, the 28th or 29th beats the 20th every time.
Clean Tools, Clean Hands
Wash your knife, spoon, and scoop with hot soapy water before you start, a dirty tool drags bacteria straight into fresh flesh. Dry everything thoroughly, and rinse tools between pumpkins if you're carving more than one.
Lighting Choices: Heat Is the Enemy
A real candle adds that classic glow, but the flame warms the pumpkin from the inside and speeds decay, drying the carved walls until they crack and pull back.
If you insist on a real candle, use a short votive in a glass holder, trim the wick, and never leave it unattended.
A Quick Pre-Carve Checklist
- Firm pumpkin, dry stem, no soft spots
- Stored cool and dry until carving day
- Carved 2 to 3 days before display, not a week
- Tools washed, dried, and ready
Get those five things right and you've already beaten half the pumpkins on the block. The other half are the ones with a candle melting their face off by October 25.
Conclusion: Keep Your Jack-o'-Lantern Looking Fresh
Carving a pumpkin is the fun part. Keeping it alive past November 1 is the real challenge. Clean it well, treat it often, keep it cool, and your jack-o'-lantern will hold its grin a lot longer.
And while your pumpkin does its thing on the porch, wear your Halloween spirit instead of scraping it off the steps. Caltucky Creations makes funny graphic tees and cozy hoodies for exactly this season, plus scented candles and mugs for the pumpkin-spice crowd.
Get started with Caltucky Creations and find a Halloween design that outlasts your pumpkin.
Frequently Asked Questions
How long can you preserve a carved pumpkin?
A carved pumpkin typically lasts 3 to 7 days outdoors in cool fall weather, or up to 10 to 14 days indoors with proper cleaning and sealing. Factors like temperature, humidity, and direct sunlight play a big role. If you sanitize the interior, apply a moisture barrier, and keep it out of harsh conditions, you can push toward the longer end of that range.
What do you spray on pumpkins to preserve them?
A diluted bleach solution (about 1 tablespoon of bleach per quart of water) is the most common spray for sanitizing carved pumpkins. White vinegar mixed with water is a gentler alternative. Commercial pumpkin preservatives are also available. After spraying, let the pumpkin air dry completely before displaying it. Always apply sprays outdoors or in a ventilated area.
Does Vaseline help preserve carved pumpkins?
Yes, petroleum jelly can help preserve carved pumpkins by creating a moisture barrier on exposed flesh and cut edges. It slows moisture loss and makes it harder for mold to take hold. Apply a thin layer to all carved surfaces after cleaning and drying. Vegetable oil works similarly but tends to be messier and may attract pests outdoors.
How can you tell when a carved pumpkin is no longer safe to display?
Watch for soft spots, dark mushy patches, fuzzy mold growth, a sour or fermented smell, and shriveling around the carved edges. If the pumpkin is collapsing or leaking liquid, it is past saving. Remove and discard it promptly to avoid attracting pests. Compost it if your municipality allows pumpkin composting.