

Table of Contents
- Why Graphic Hoodies Are a Different Beast
- Know Your Print Before You Touch That Stain
- The Stain-Fighting Toolkit (No Bleach Allowed)
- How to Remove Stains From Graphic Hoodies, Step by Step
- Removing Set-In Stains From Sweatshirts Without Killing the Print
- How to Wash Graphic Hoodies So Stains Come Out and Prints Stay Put
- How to Prevent Graphic Print Cracking Before It Starts
- The Bottom Line
- Frequently Asked Questions
Last Updated: September 10, 2026
Why Graphic Hoodies Are a Different Beast
A graphic hoodie is a cotton-poly garment with a printed design bonded to its surface, which means stain removal has two jobs instead of one: lift the mess without wrecking the print. That second job is where most laundry advice falls apart. This guide from Caltucky Creations walks through how to remove stains from graphic hoodies without turning your favorite joke into a faded ghost.

Here's the core tension: stain removers are designed to attack pigment, and so is your print. Bleach, hot water, and heavy scrubbing don't know the difference between a coffee splatter and a screen-printed punchline (cleaninginstitute.org). Treat the stain like a stain and you'll treat the graphic like a casualty.
The good news is that with the right technique, most stains come out and the print stays crisp. The trick is knowing what you're working with before you touch anything.
Know Your Print Before You Touch That Stain
Print type determines everything: how much heat it tolerates, how much friction it survives, and which cleaners are safe. A heat transfer and a screen print can look identical on the shelf and behave completely differently in the wash. Before you touch that stain, spend sixty seconds figuring out what you're actually dealing with.
Screen Print vs. Heat Transfer vs. DTG
Screen printing pushes thick ink through a mesh and cures it into the fabric. It's the most durable option and handles gentle washing well.
Heat transfer bonds a printed film to the surface with heat and pressure. It's the most fragile of the three, and heat is its enemy.
DTG (direct-to-garment) sprays water-based ink directly into the fabric, similar to a home printer. It sits in the fibers rather than on top, so it survives washing but fades faster than screen print.
| Print Type | How It's Applied | Heat Tolerance | Stain-Removal Caution |
|---|---|---|---|
| Screen print | Ink pressed through mesh, cured | High | Gentle cycle is fine |
| Heat transfer | Film bonded with heat | Low | Avoid heat entirely |
| DTG | Ink sprayed into fibers | Medium | Skip harsh solvents |
The Sixty-Second Print Test
Most guides tell you to "check the label" and call it a day. Labels rarely say whether the graphic is a heat transfer or DTG. Here's how to find out without a chemistry degree:
- The fingernail test. Drag a fingernail lightly across the edge of the print. If you feel a distinct raised lip or a rubbery ridge, it's screen print or heat transfer. If the edge is nearly flush with the fabric, it's DTG.
- The stretch test. Gently pinch and pull the fabric under the print. Screen print stretches with the fabric and springs back. Heat transfer tends to resist, then crack along its edges. DTG stretches but the ink looks slightly faded where it pulls.
- The inside-out check. Flip the hoodie inside out. Heat transfers often leave a faint ghost impression or a slightly stiffer patch on the reverse side of the fabric. Screen print and DTG usually leave no reverse mark.
- The warm-iron corner test (only if you're still unsure). Set an iron to its lowest steam-free setting, place a cotton pillowcase over a hidden corner of the print, and press for three seconds. If the print sticks to the pillowcase or looks glossy, it's a heat transfer, never iron it again. If nothing changes, it's likely screen print or DTG.
Colorfastness: Test the Fabric and the Ink Separately
A stain remover can pass the print test and still bleed the base fabric, or vice versa. Test both, in two spots:
- Fabric test: Find an inside seam or the inside of the hem. Dab your chosen cleaner on a cotton swab and press it against the fabric for 30 seconds. If color transfers to the swab, the dye is not colorfast and you need a gentler approach.
- Ink test: Pick a hidden corner of the graphic, the edge of a letter, a spot under the hood, or the back of a sleeve print. Apply a drop of cleaner, wait two minutes, and blot with a white paper towel. Any color on the towel means the ink is bleeding.
If either test fails, downgrade to the mildest option: a drop of grease-cutting dish soap and cold water. It's slower, but it's the only thing that won't make a bad day worse.
The Stain-Fighting Toolkit (No Bleach Allowed)
Bleach is the fastest way to ruin a graphic hoodie. It doesn't just lighten the stain; it eats the print and can leave a permanent ghost outline. Build your kit around bleach-free options instead.

- Grease-cutting dish soap for food and oil stains
- Enzyme-based detergent for protein stains like sweat, blood, and grass
- Baking soda paste (baking soda plus water) for absorbing and lifting
- Isopropyl alcohol for ink and marker stains, spot tested first
- Hydrogen peroxide for tough organic stains, used sparingly
- Cold water for rinsing, always
- A soft cloth or soft-bristle brush for blotting and gentle agitation
A common mistake is grabbing the strongest cleaner on the shelf. In practice, the mildest option that works saves the print. Start with dish soap and cold water, and only escalate if the stain refuses to budge.
How to Remove Stains From Graphic Hoodies, Step by Step
The full process takes about 20 minutes of hands-on work plus a wash cycle, and it works on most fresh stains. Follow the steps in order and resist the urge to rush.
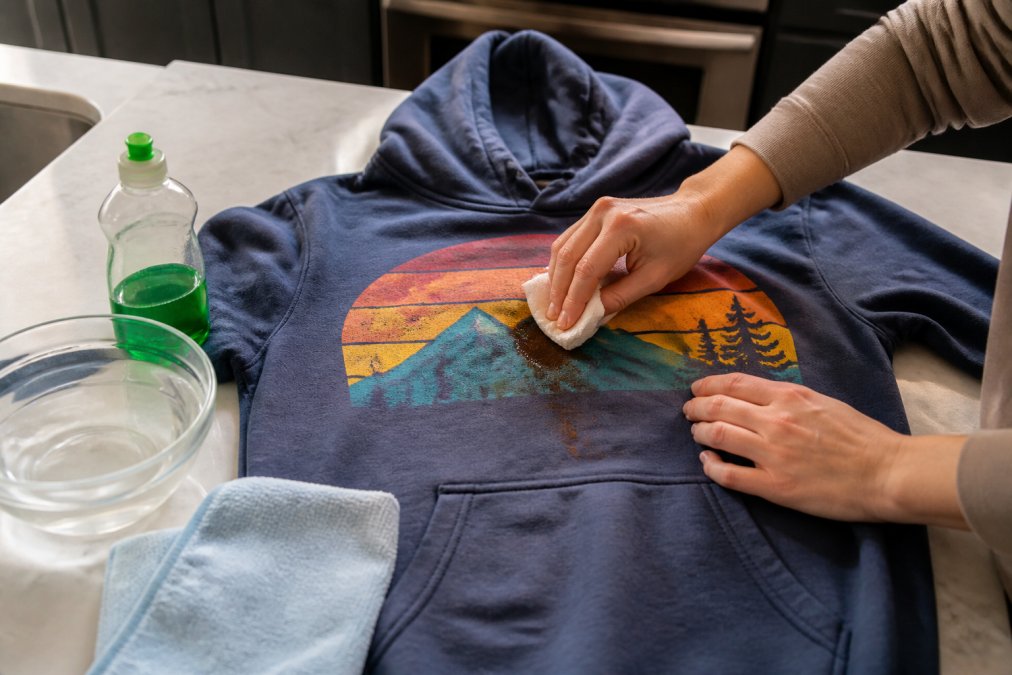
Step 1: Blot, Don't Rub
Blot the stain with a clean cloth, working from the outside in, so you don't spread it into a bigger mess. Rubbing pushes the stain deeper into the fibers and roughs up the print surface, which is how cracking starts. Press, lift, repeat with a fresh section of cloth until no more transfers.
Step 2: Spot Test and Pre-Treat
Spot test any cleaner on a hidden area first, like inside the hem or the back of the print. Apply a small amount, wait a few minutes, and check for color bleeding or print damage. If it's clear, pre-treat the stain with your chosen cleaner and let it sit for 10 to 15 minutes. This dwell time does most of the work, so you don't have to.
Step 3: Wash, Rinse, and Check Before Drying
Wash the hoodie on a gentle cycle with cold water and a bleach-free detergent. Before you even think about the dryer, check the stain. Heat sets whatever's left, so if the mark is still visible, repeat the pre-treat and wash. Only dry once the stain is gone.
Removing Set-In Stains From Sweatshirts Without Killing the Print
Removing set-in stains from sweatshirts takes patience, not force. Old stains have bonded to the fibers, so they need longer dwell times and repeated gentle passes rather than aggressive scrubbing. The catch: the same dwell time and repeated passes that lift a three-week-old grease spot can also dull, crack, or fade the graphic sitting right next to it. Here's how to win both fights.
Match the Remedy to the Stain
- Grease and oil (food, lotion, sunscreen): Work a drop of grease-cutting dish soap into the fabric with your fingertips, let it sit 15 minutes, then rinse with cold water. Repeat up to three times before escalating.
- Protein (sweat, blood, grass, egg): Soak the stained area in cold water with a scoop of enzyme-based detergent for 30 minutes. Never use hot water, heat sets protein stains permanently (cleaninginstitute.org).
- Ink and marker: Dab isopropyl alcohol onto a clean white cloth and blot the stain from the outside in. Never pour alcohol directly onto the print; it can dissolve the ink bond.
- Coffee, tea, wine, juice: Blot, then apply a 1:1 mix of cold water and white vinegar. Let it sit 10 minutes, rinse, and repeat if needed.
- Deodorant and antiperspirant buildup: These are aluminum-based and behave like grease. Dish soap first, then a baking soda paste overnight on light fabrics only.
The Gentle Round Method
Two or three gentle rounds beat one harsh one every time. Here's the loop:
- Pre-treat with your chosen remedy and let it dwell.
- Rinse with cold water only.
- Check the stain under good light, not the dim bathroom bulb.
- If it's still visible, repeat. If it's faded but not gone, do one more round before considering anything stronger.
- Only after three rounds should you consider a commercial oxygen-based stain remover (never chlorine bleach).
When the Print Takes Collateral Damage: Post-Stain Restoration
Sometimes the stain comes out and the graphic doesn't survive the rescue. Here's how to handle the three most common casualties:
Cracked heat transfer. Small cracks can sometimes be softened by placing a clean cotton pillowcase over the print and pressing with a warm (not hot) iron for five seconds at a time. This is a partial fix, it won't restore a badly cracked print, but it can seal hairline splits. Test on a hidden corner first.
Faded DTG or screen print. Once ink fades, it doesn't come back. Fabric markers matched to the print color can touch up small areas, but the result is visible up close. The honest answer: faded prints are a wear pattern, not a repair job.
Chalky baking soda halo on dark fabric. Rinse the area with a 1:1 mix of white vinegar and cold water, then wash normally. The vinegar neutralizes the alkaline residue that causes the white film.
Stiff or crusty print after cleaning. This usually means detergent residue dried into the ink. Rewash the hoodie inside out on a gentle cycle with no detergent, then air dry. The residue lifts, the print softens.
A little prevention goes a long way. Treat your hoodie like the wearable joke it is, and it'll keep delivering the punchline for years, even after the ketchup incident of last weekend.
How to Wash Graphic Hoodies So Stains Come Out and Prints Stay Put
Learning how to wash graphic hoodies correctly prevents most stains from setting in the first place and keeps prints from fading. The rules are simple: cold water, gentle cycle, and turn it inside out.

Wash graphic hoodies inside out to protect the print from mechanical agitation against other garments. Use cold water, a bleach-free detergent, and the gentle or delicate cycle. Skip fabric softener, which leaves a residue that dulls prints and traps odors. If you can, wash hoodies separately from towels and jeans, whose zippers and rough textures are hard on prints.
Then air dry. If you must use a machine, tumble dry low and pull the hoodie out while it's still slightly damp.
How to Prevent Graphic Print Cracking Before It Starts
Preventing graphic print cracking comes down to three habits: avoid heat, avoid friction, and avoid harsh chemicals. Heat is the number one cause, whether from a hot wash, a hot dryer, or an iron pressed directly onto the design. If you need to smooth wrinkles, iron the hoodie inside out and never touch the iron to the print.
Friction is the quiet second cause. Zippers, Velcro, and rough fabrics rub against the design in the wash and slowly wear it down, which is why inside-out washing matters. Chemicals round out the trio: bleach and strong solvents break down the ink's bond with the fabric over time.
A little prevention goes a long way. Treat your hoodie like the wearable joke it is, and it'll keep delivering the punchline for years.
The Bottom Line
Stains on a graphic hoodie are a two-front battle: lift the mess and protect the print. Cold water, gentle cycles, bleach-free cleaners, and air drying handle almost everything, and patience beats force on the stubborn stuff.
When you're ready to restock your rotation with designs worth protecting, Caltucky Creations makes funny, original hoodies printed on soft cotton-poly basics that hold up wash after wash. Browse the collection, find a joke that fits, and give it the care it deserves.
Frequently Asked Questions
Can stains actually be removed from a hoodie once they've set in?
Yes, most set-in stains come out with patience rather than panic. Soak the stained area in cold water with an enzyme-based detergent for 30 minutes, then work a little grease-cutting dish soap into the spot with your fingers. Rinse and repeat before you ever consider drying. Heat is what locks a stain into the fabric, so keep the hoodie out of the dryer until the mark is completely gone. If one round doesn't do it, give it a second soak instead of reaching for bleach, which can strip the print and the fabric color.
Can I use OxiClean on graphic tees and hoodies?
Oxygen-based stain removers are usually gentler than chlorine bleach, but the print still deserves caution. Mix the powder in cool water first, spot test it on a hidden area like the inside hem, and let it sit for 15 minutes to see how the fabric and ink react. If the color holds, apply the solution directly to the stain and let it work for up to an hour. Skip bleach entirely, since it breaks down both the print and the fabric's fiber integrity, especially on cotton-poly blends.
Will hot water ruin the graphic on my hoodie?
Hot water is the enemy of both stains and prints, for different reasons. On the stain side, heat can set a protein or grease mark deeper into the fibers. On the print side, hot water softens the ink and speeds up cracking, peeling, and fading. Stick to cold water for every wash and rinse, and save the warm cycle for towels. Your hoodie's graphic will thank you by surviving more than one season of wear.
What's the best way to wash graphic hoodies so the print survives?
Turn the hoodie inside out, wash it on a gentle cycle in cold water with a mild, bleach-free detergent, and skip the fabric softener, which leaves a residue that can dull the print. Wash similar colors together to cut down on mechanical agitation, and never overload the machine. When the cycle ends, reshape the hoodie and air dry it flat or hang it away from direct sunlight. Tumble drying on low is a last resort, and only if you're willing to accept some risk to the print.
Your hoodie survived the coffee, the wing sauce, and that one questionable camping trip. Now it deserves a replacement that's just as tough and twice as funny. Caltucky Creations prints original humor on quality soft-style hoodies, plus matching tees, candles, mugs, and blankets for the full cozy lineup. Continue shopping and find your next favorite graphic hoodie.